Tuesday, September 23, 2014
Hockey Jersey Training Camp - Day 6 - How to Make Your Own Patches
Hockey Jersey Training Camp now reaches Day 6 and our "drill" today is on How to Make Your Own Patches.
One of the things we really like to collect here at Third String Goalie are international jerseys. Those worn in the annual IIHF World Championships can be distinguished by their sponsorship patches worn on the shoulders or upper arms, which give World Championship jerseys their distinctive look.
Unfortunately, there are no sources we know of to obtain the embroidered versions for our jerseys, so we decided to see if we could make our own, having printed a number of our own t-shirts in the past.
Using the picture resources available on Getty Images, and the International Ice Hockey Federation's website, as well as some publications we have in our personal library, it's possible to determine which company was featured on many teams jerseys from year to year.
Some nation's sponsor changes from year to year, while others keep the same one for for a number of consecutive years, but the style of patch may or may not remain the same, so it's important to do your research to determine which exact version is the correct one for the year you want to replicate.
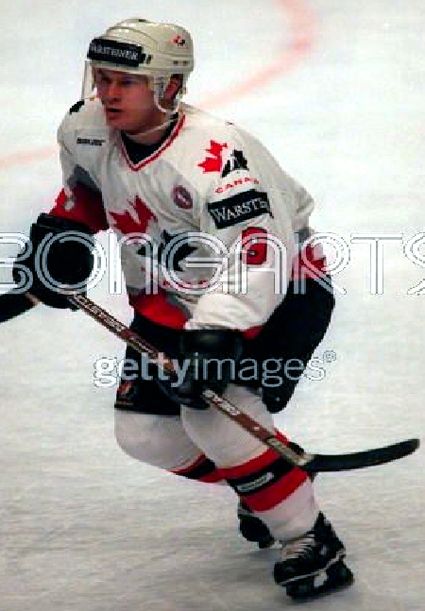
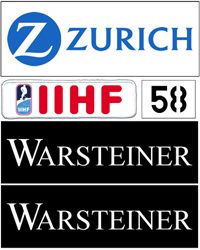
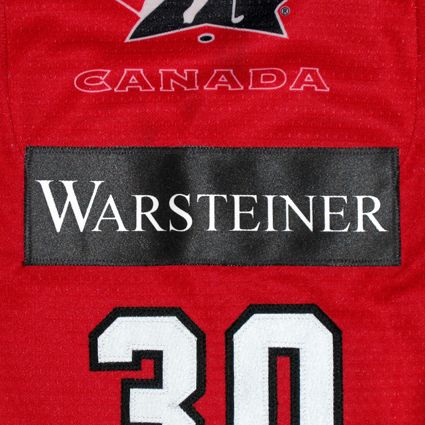
Once you have decided on the company logo you wish to feature, the next step is to create the artwork needed to make your patch. For that, we rely on BrandsOfTheWorld.com. It appears that you now have to register for an account with them prior to downloading any logos. Once you are registered, simply type the name of the company whose logo you want to find in the search box and hopefully you will get just the logo you need for your patch. Common sponsors include Zepter, Skoda, Tissot and Warsteiner. For our purposes, let's focus first on Warsteiner Beer. Here's the patch in action on a Team Canada jersey in 1996.
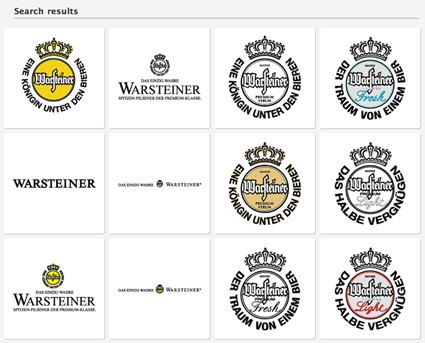
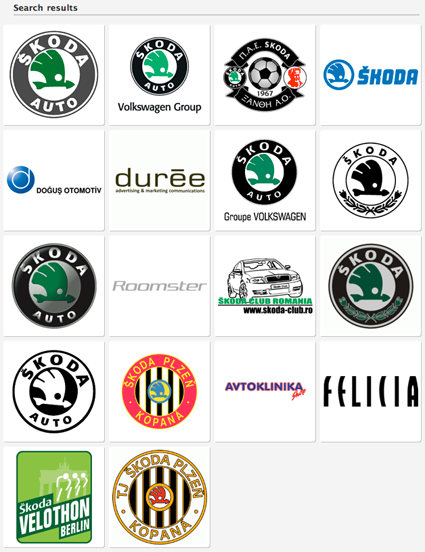
Looking at the search results from BOTW, we can see (counting from the upper left) #2 and #7 are the closest to the logo used on the patch.
Since we only need part of the logo, in this case it does not matter which of the two versions we choose. Once you have agreed to their terms of use and downloaded the logo, you can open it in either Adobe Illustrator or Adobe Photoshop.
The actual patches vary in length and height, but in general are 8" wide and 3" in height. In photoshop we create a rectangle that size. Technically, we make the rectangle just slightly under 8" in order to fit the width of a 10" x 8" photoshop document. You will need to vary the height of your patch to replicate the dimensions of the original you are reproducing, as some are narrower in height.
We fill the rectangle with the appropriate background color we want our patch to be. We then open the logo file in Illustrator and "ungroup" the various elements and throw away what is extraneous to our needs and copy and paste the Warsteiner word onto the black rectangle. If you are more comfortable, you can open the file with Photoshop and just erase the unwanted elements. Once the color of the Warsteiner wordmark has been changed from black to white (either in Illustrator prior to pasting or after it's in Photoshop) and it's sized and centered on the black rectangle, the artwork for a single patch is complete. Be sure to not have the logo too close to the edge of the rectangle in order to leave room for stitching. Now, simply make a copy of the first patch in order to have one for each shoulder and you're set.
Step 1aaaaaaaaaaaaaaaa Step 2aaaaaaaaaaaaaaaa Step 3
In the case of the Skoda patches, none of the round logos will work for the wordmark used on the patch.
We will then try to find the correct font in order to duplicate the wordmark on our own. Once you have identified the correct font, you can recreate the wordmark for the patch with the type tool in Illustrator or Photoshop.
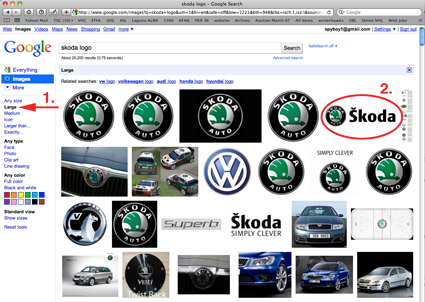
If you do not have an extensive font library, a third method to acquire a needed logo is to do a google image search for "Skoda logo" and hope for the best. Obviously the larger the image we can start with, the better results we can obtain, so once we have done the basic search, we select "large" in the links in the left hand column (#1).
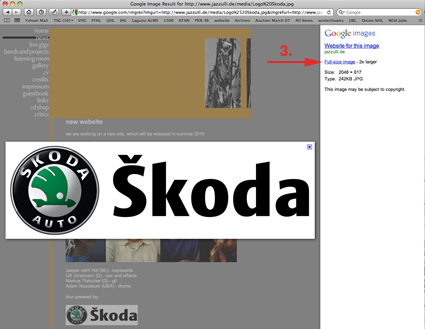
Seeing a wordmark we like, we click on it (#2) and are taken to the website for the image. Look on the right hand side of that page and click on "Full-size image" (#3).
This will show you the image in it's full size.
Save it to your desktop by your preferred method (#4) and then create your artwork in Illustrator or Photoshop as detailed above.
To summarize, you need to obtain the logo you need for your patch by whatever method works for you, either downloading a eps file from the internet, creating it yourself with a graphic program, downloading an image from the internet or even scanning an ad from a magazine. Then recreate the artwork of the patch you wish to make in the program of your choice. A bit of internet savvy and some computer graphic skills will be quite helpful.
In addition to creating your own designs as described, you can also simply use a good quality photograph found online of an original patch from a game worn jersey. Quite often the shadowing and texture detail will survive through to your printed version, giving it a nice depth and a quite realistic appearance from a short distance, which is how most other people will view it.
The next step is to create the patch to be sewn on your jersey. You will need to buy something called "transfer paper". We highly recommend Epson Transfer Paper.
The main use for transfer paper is to make your own t-shirt designs using any inkjet printer. The transfer paper has a special coating which prevents the ink from soaking into the paper as it usually would. Your printed design on the transfer paper acts as an iron-on you will use to transfer your patch design onto a piece of white twill.
An important note: at some point in the process you will need to flip your design so it appears backwards when printed! You can either flip your image in photoshop prior to printing, or some printers have a setting which will do that for you as part of the printing process. We strongly recommend you read and understand the instructions that come with the transfer paper.
Final logo creation aaaaaaaaaaaaaaaaaa Flipped for printing
If your printer has a "t-shirt transfer" preset, or you follow the settings that come with the paper, your results will not be the best they can be. The basic setting for t-shirt transfers puts out very little ink, making for a lousy looking printout. This is fine for printing on a cotton t-shirt, as the ink will spread slightly when transferred onto a shirt, giving you a nice looking result. For our patch making purposes, we recommend going up one or two ink settings when printing on twill for deeper blacks and greater contrast which make for better looking patches. Look for a quality setting similar to "photo paper" or "glossy photo paper".
Try printing your design on a piece of plain paper on the "t-shirt transfers" setting and then one of the "photo paper" settings for comparison to not only see the difference in the amount of ink laid down on the paper, but to confirm that your images are in fact printing out backwards prior to wasting one of your precious sheets of transfer paper, which are generally $1.50 a sheet.
Once you have printed your transfers, treat them very gently, as they are quite fragile since the ink has not soaked in and is just sitting there on top of the transfer paper. We recommend putting a sheet of plain paper on top of them and putting them in an envelope or empty packaging some other paper came in for protection. It is critical that you keep any moisture away from your printed transfers. Any water droplets, be it a bead of sweat, splash, drop of rain or condensation drip from a glass, even a sneeze, will cause the ink to run like watercolor paint, ruining that image permanently.
Something you should understand about injket printers and transfer paper is that there is no white ink. Any white parts of your design will have to be supplied by the background material,wether it's making patches or t-shirts. If you were to try to transfer an image onto a black shirt, the black will overwhelm your image since the ink from your printer is very thin and not opaque in the least.
The other supply you will need is some white twill, the same material used for putting names and numbers on jerseys, which is available from Stahl's, who should allow you to purchase material without an account as a guest. A yard of twill (51" x 36"), the smallest amount you can buy, will yield 16 pieces 9" x 12", which is slightly bigger than a sheet of transfer paper. A yard of twill should be big enough to last most collectors a lifetime and will cost approximately $9 plus shipping. We recommend the kind of twill without any adhesive backing, which Stahl's calls unc twill 51".
The reason we recommend the non-adhesive backed twill is that many times we have located an embroidered version of a patch later on, and want to remove our patch and replace it. What we have encountered is the adhesive from the twill will remain on the jersey after our patch is removed and it can be quite visible, especially on darker jerseys. Quite frequently, the embroidered patch will not be large enough to cover the evidence of the printed original.
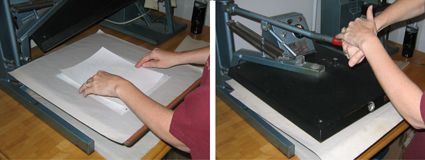
Rather than ironing on our designs ourselves at home, we prefer to take them to someone who has a professional heat press. The higher temperature and pressure the heat press can provide will give you outstanding results you simply cannot approach at home with a hand held iron. Look for a t-shirt shop or a shop that does team jerseys in your area.
Bring with your twill and your printed transfers oplus the instructions provided by Epson for the press operator to read so they will know what kind of settings to use with the transfer paper if they are not familiar with it.
Placing the printed transfer paper on the twill and using the heat press
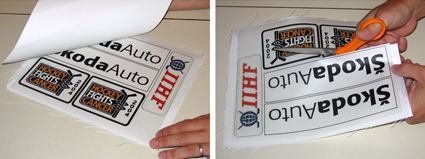
One other important tip to pass along is after your transfer is pressed onto the twill, do to NOT peel the backing paper off while the twill is still warm. It will cause the twill to distort in shape, resulting in a warped rectangle you will not want permanently sewn to your jersey. We recommend letting it cool down before taking the backing paper off.
Once you do remove the backing paper, there will be a layer of plastic adhered to the twill over the top of your patch design. Normally when making a t-shirt this will disappear in the wash. If possible, peel that off. It's a bit like trying to remove peeling skin after a sunburn or a film of Elmer's glue from your fingers after it's dried. This will make your final patch that much less shiny for the best possible look.
Now that your patches are printed, just cut them out with a sharp scissors and take them in to whomever you use for your sewing and have them applied with a zig-zag stitch for the proper look.
Peeling the backing paper off of the twill and then cutting out the patches
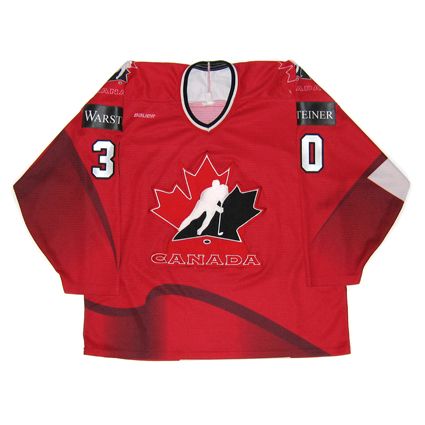
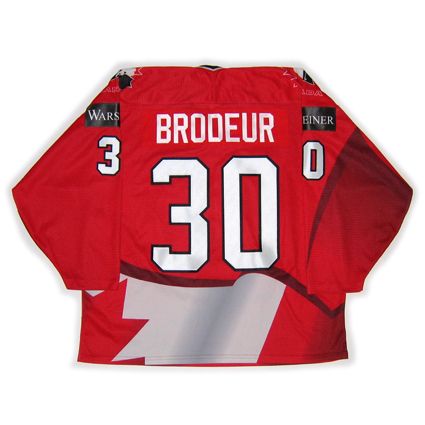
Here is the final product with the Warsteiner patches now sewn onto our 1996 Team Canada World Championships jersey.
The only critique is the semi-gloss sheen the finished patches have, but that is accentuated by the flash when we photograph them. They look better in person, especially when viewed at a distance of a few feet or more, as most people will view your jersey from while you are wearing it.
Labels:
Hockey Jersey Training Camp
Subscribe to:
Post Comments (Atom)














No comments:
Post a Comment
We welcome and encourage genuine comments and corrections from our readers. Please no spam. It will not be approved and never seen.